
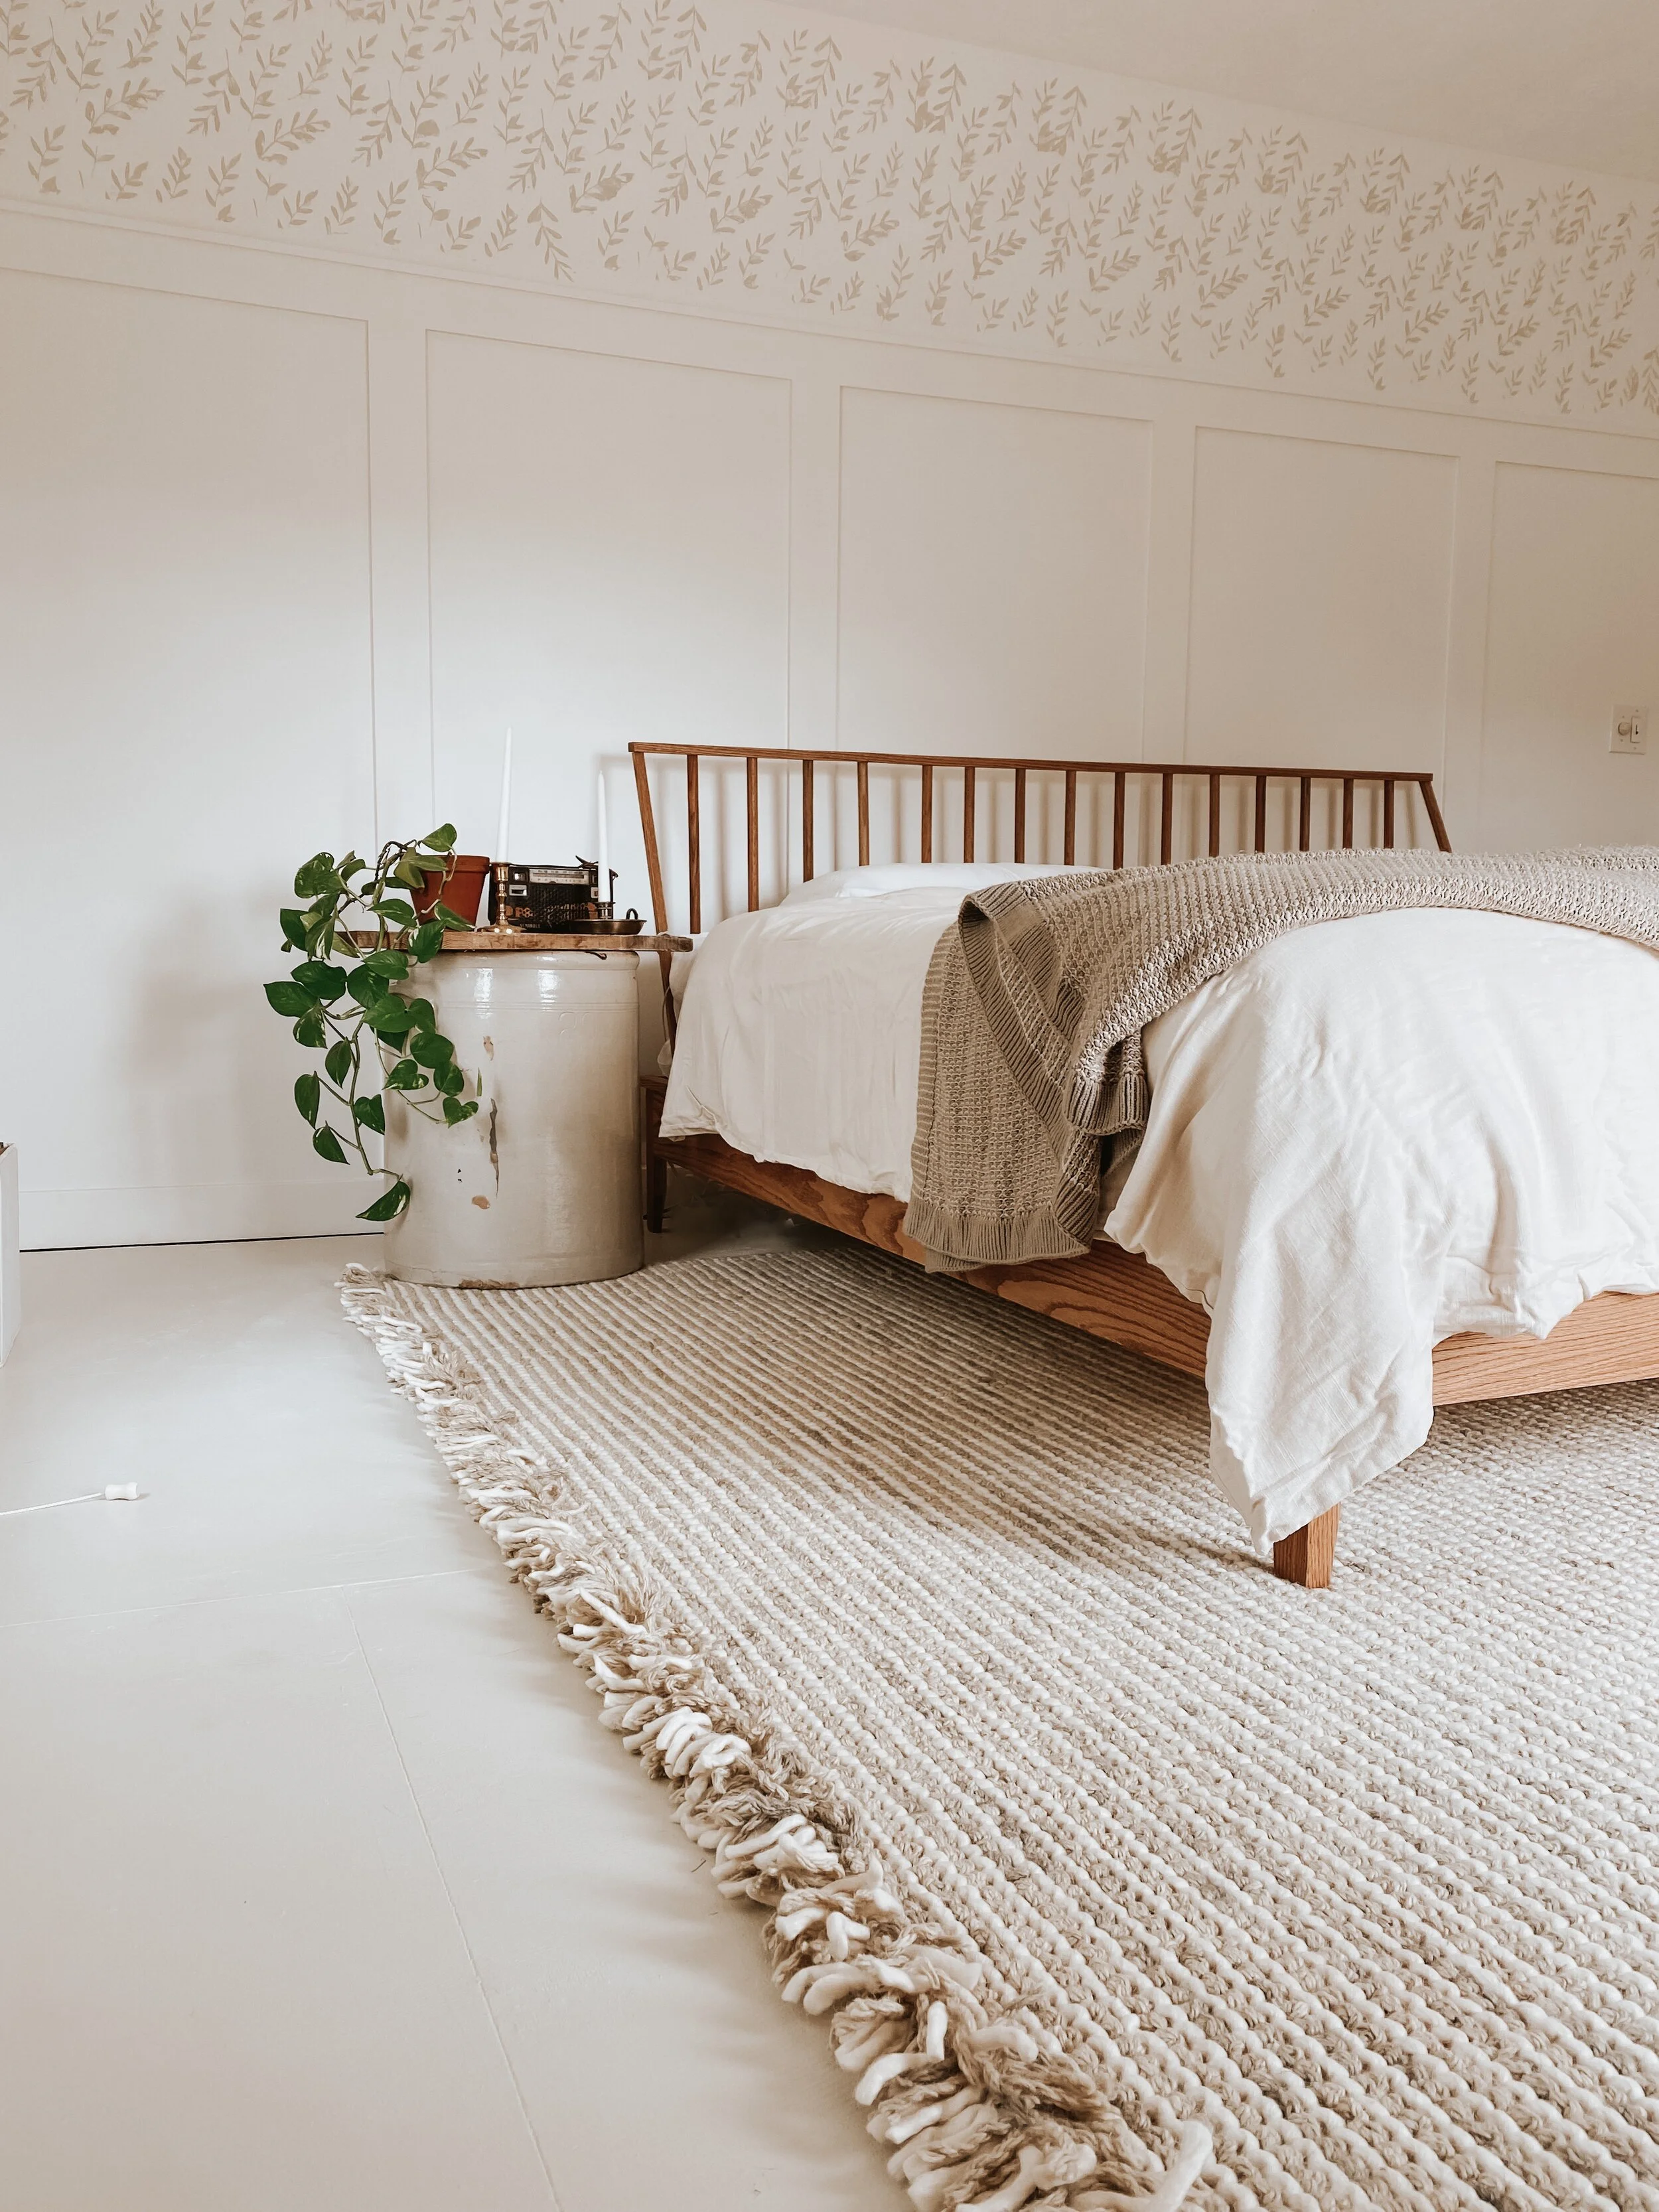
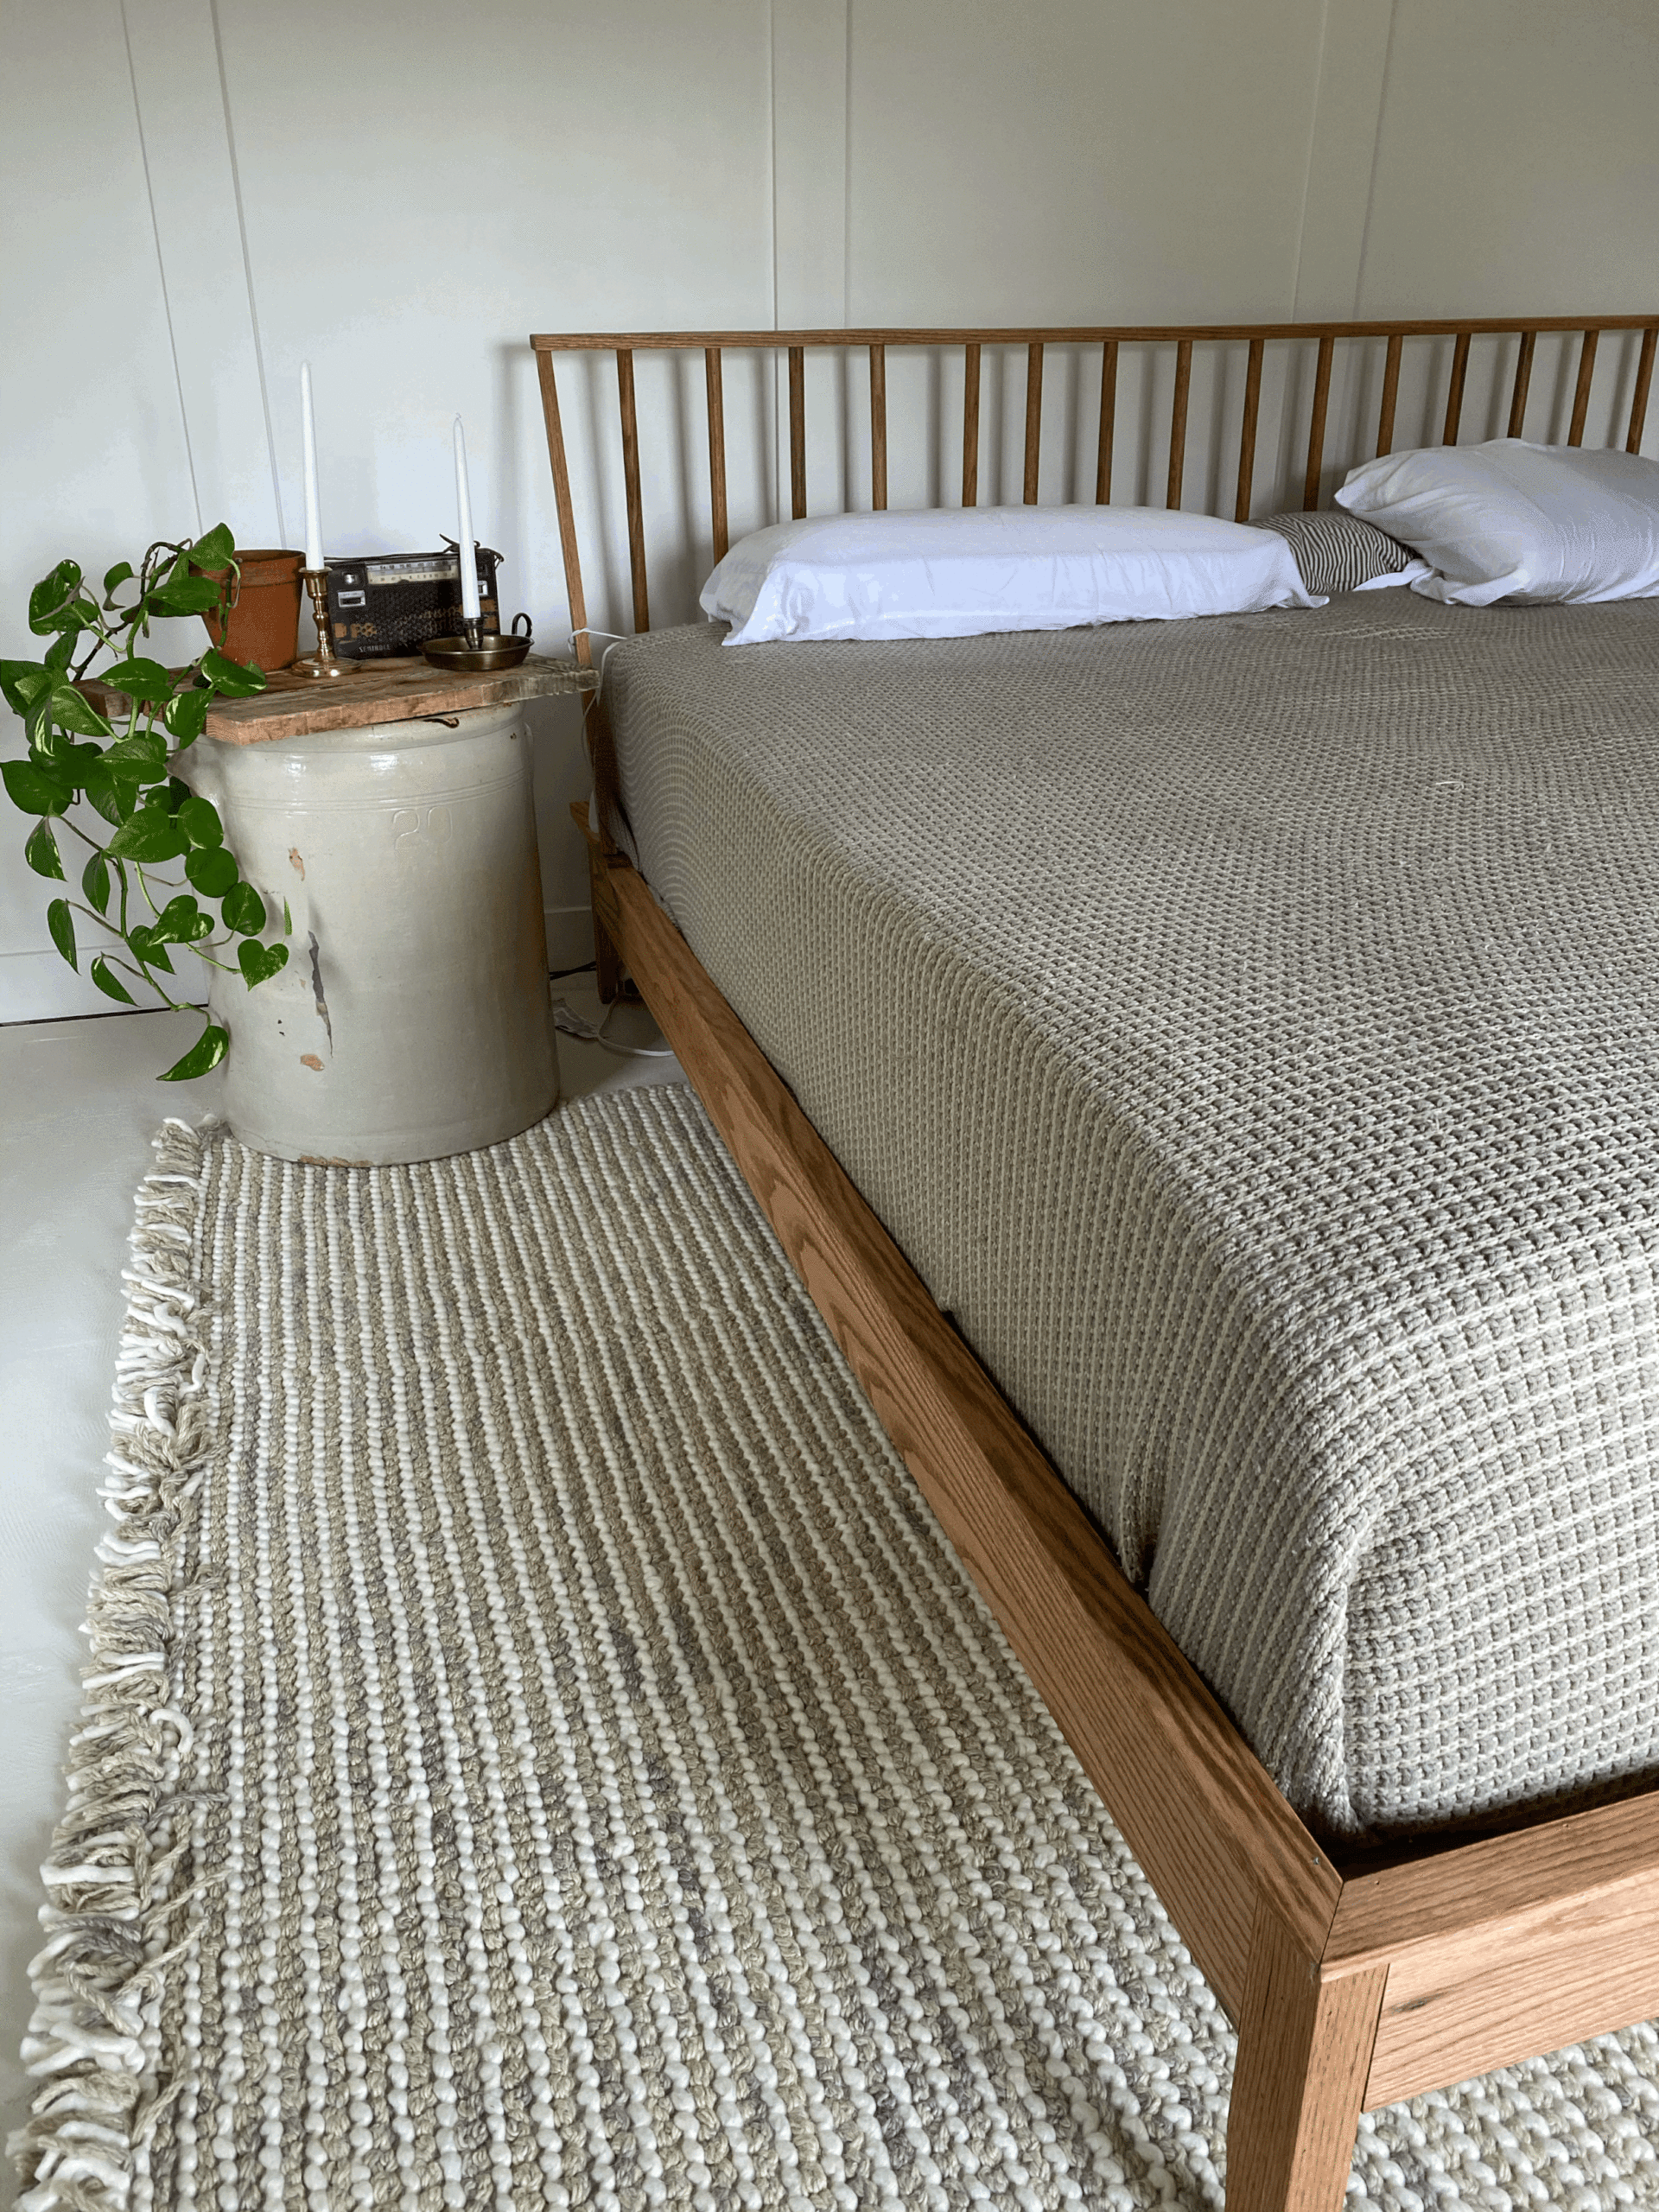
Rug Link (This rug is the 8’6” x 11’6”): https://www.rugsusa.com/rugsusa/rugs/rugs-usa-felted-wool-tasseled/Beige/200MHDH01D-860116.html
I’ve seen this bed for sale on other websites for around $1,500 – $2,500. I really like to stick to a tight budget and save money where I can. So deciding to build this bed was an easy choice.
Completely built, this bed costed me just under $300 for the lumber. Now keep in mind, I used Red Oak which is about 3x the cost of using pine. (Pine is a great inexpensive option for this build as well!)
Material List:
Red Oak (RO):
5 – 1×2@8’
4 – 1×6@8’
1 – 1×2 @ 4’
15 – 7/8’ x 36’ dowels
Pine (P):
17 – 1×3@8’ Furring strips
1 – 4×4@8’
2 – 1×2@ 8’
Cut List:
8– 1×2 (RO) cut @ 12’ (For Legs)
2 – 1×6 (RO) cut @ 75 (Foot and Headboard)
2 – 1×6 (RO) cut @ 80” (Side running boards)
2 – 1×2 (RO) cut @ 79 1/2” (For Headboard)
2 – 1×2 (RO) cut @ 12.5 (Support bracket for headboard)
2 – rip your 1×2 @ 4’ in half using a table saw. So it is now a 1 x 3/4” (headboard support)
15 – Dowels (RO) cut @ 26”
The cut list below, cut as you build and double check measurements.
2 – 1×2 (RO) cut at 6’ with one 45* angle (top trim pieces on side running boards)
1 – 1×2 (RO) cut at 79 1/2” both sides 45*
2 – 1×2 (P) cut at 80” (running side support)
17 – 1×3 (P) Furring Strips cut @ 76 1/4” (supports- aka box spring)
4×4 – measure and cut as needed (middle legs for supports/ “box spring”)
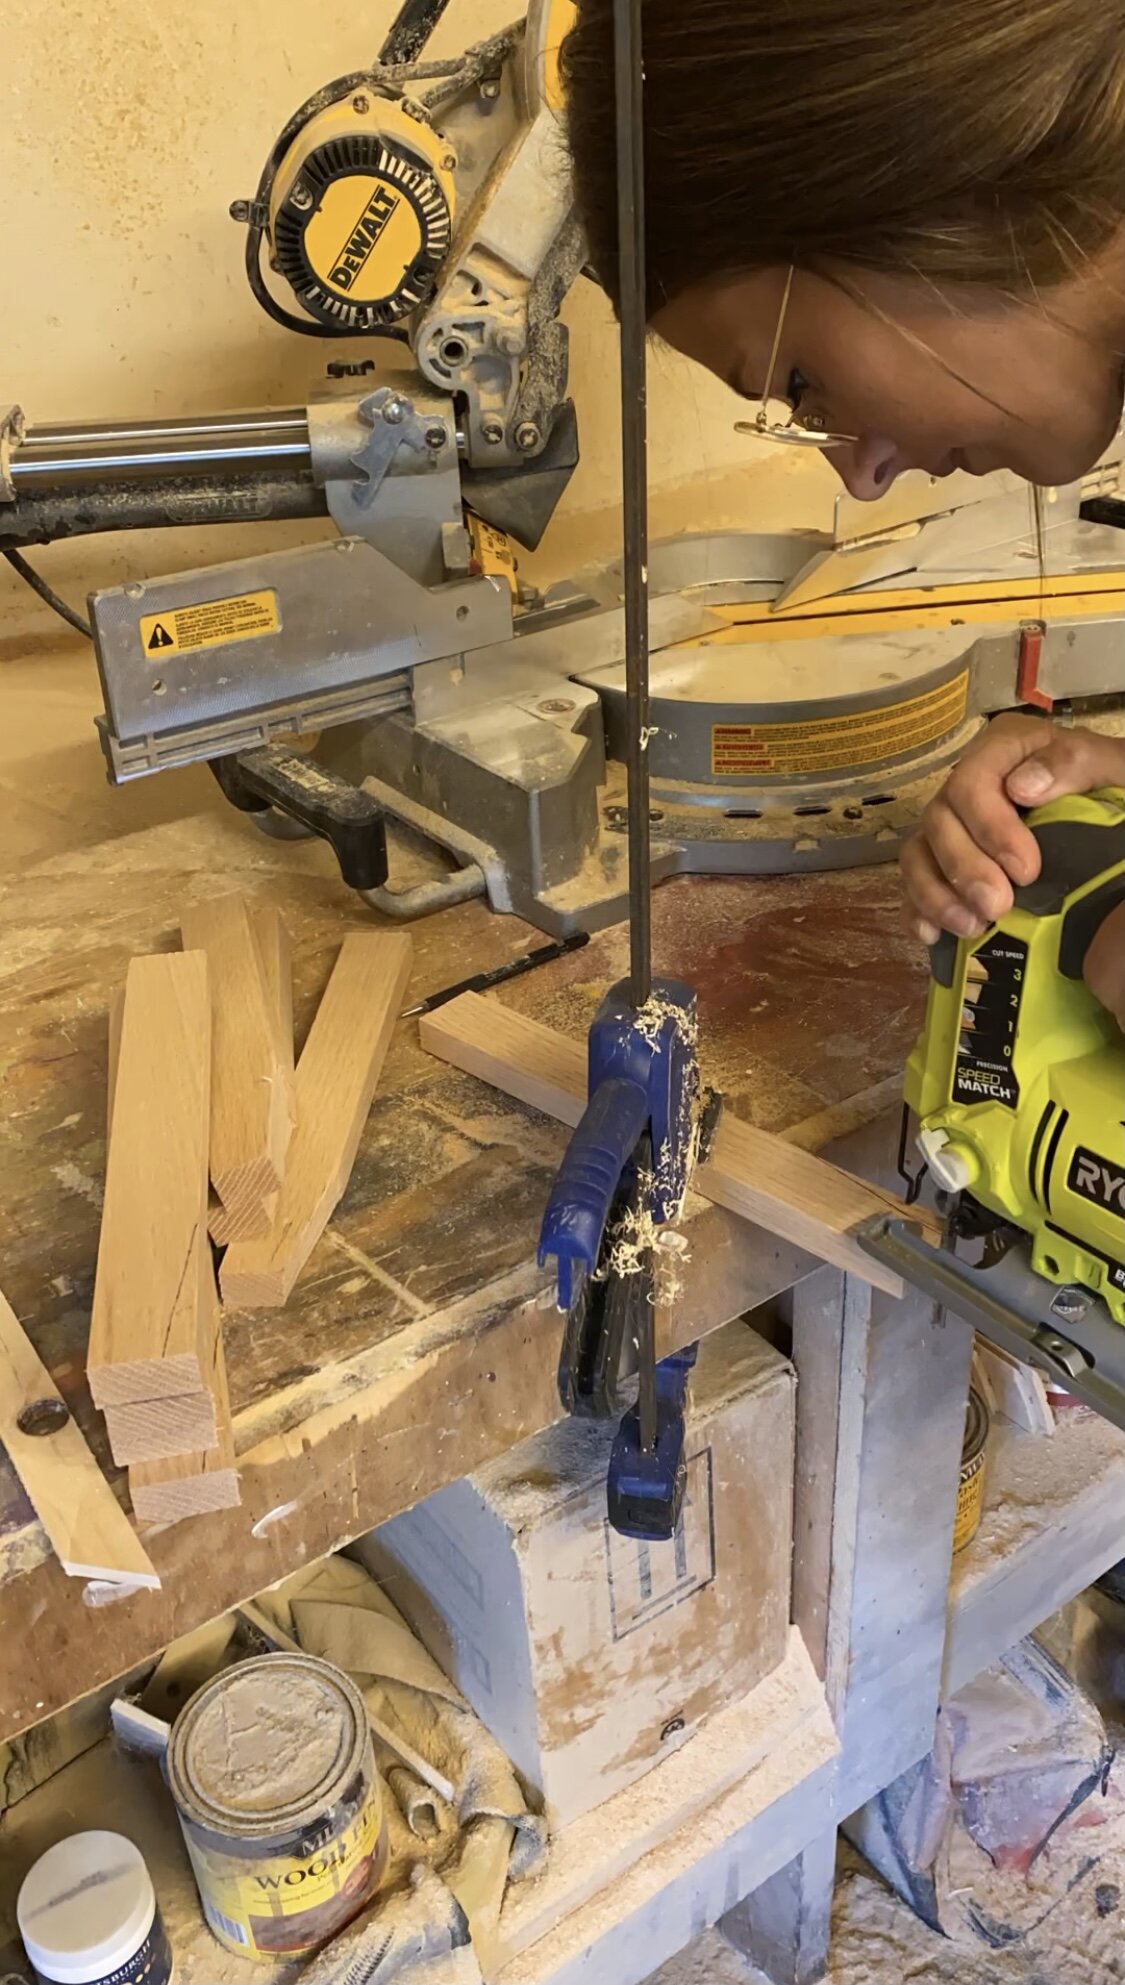
Once you have all 8 – 1×2 cut @ 12’ you’re going to create a custom angle. Whatever your heart desires. (keep in mind, you want your legs to be sturdy so don’t make this angle too narrow.) Once you have your first angle cut (I used my jigsaw), trace it on the other 7 boards and cut.
This step is totally optional. If you don’t want angled legs, continue on below.
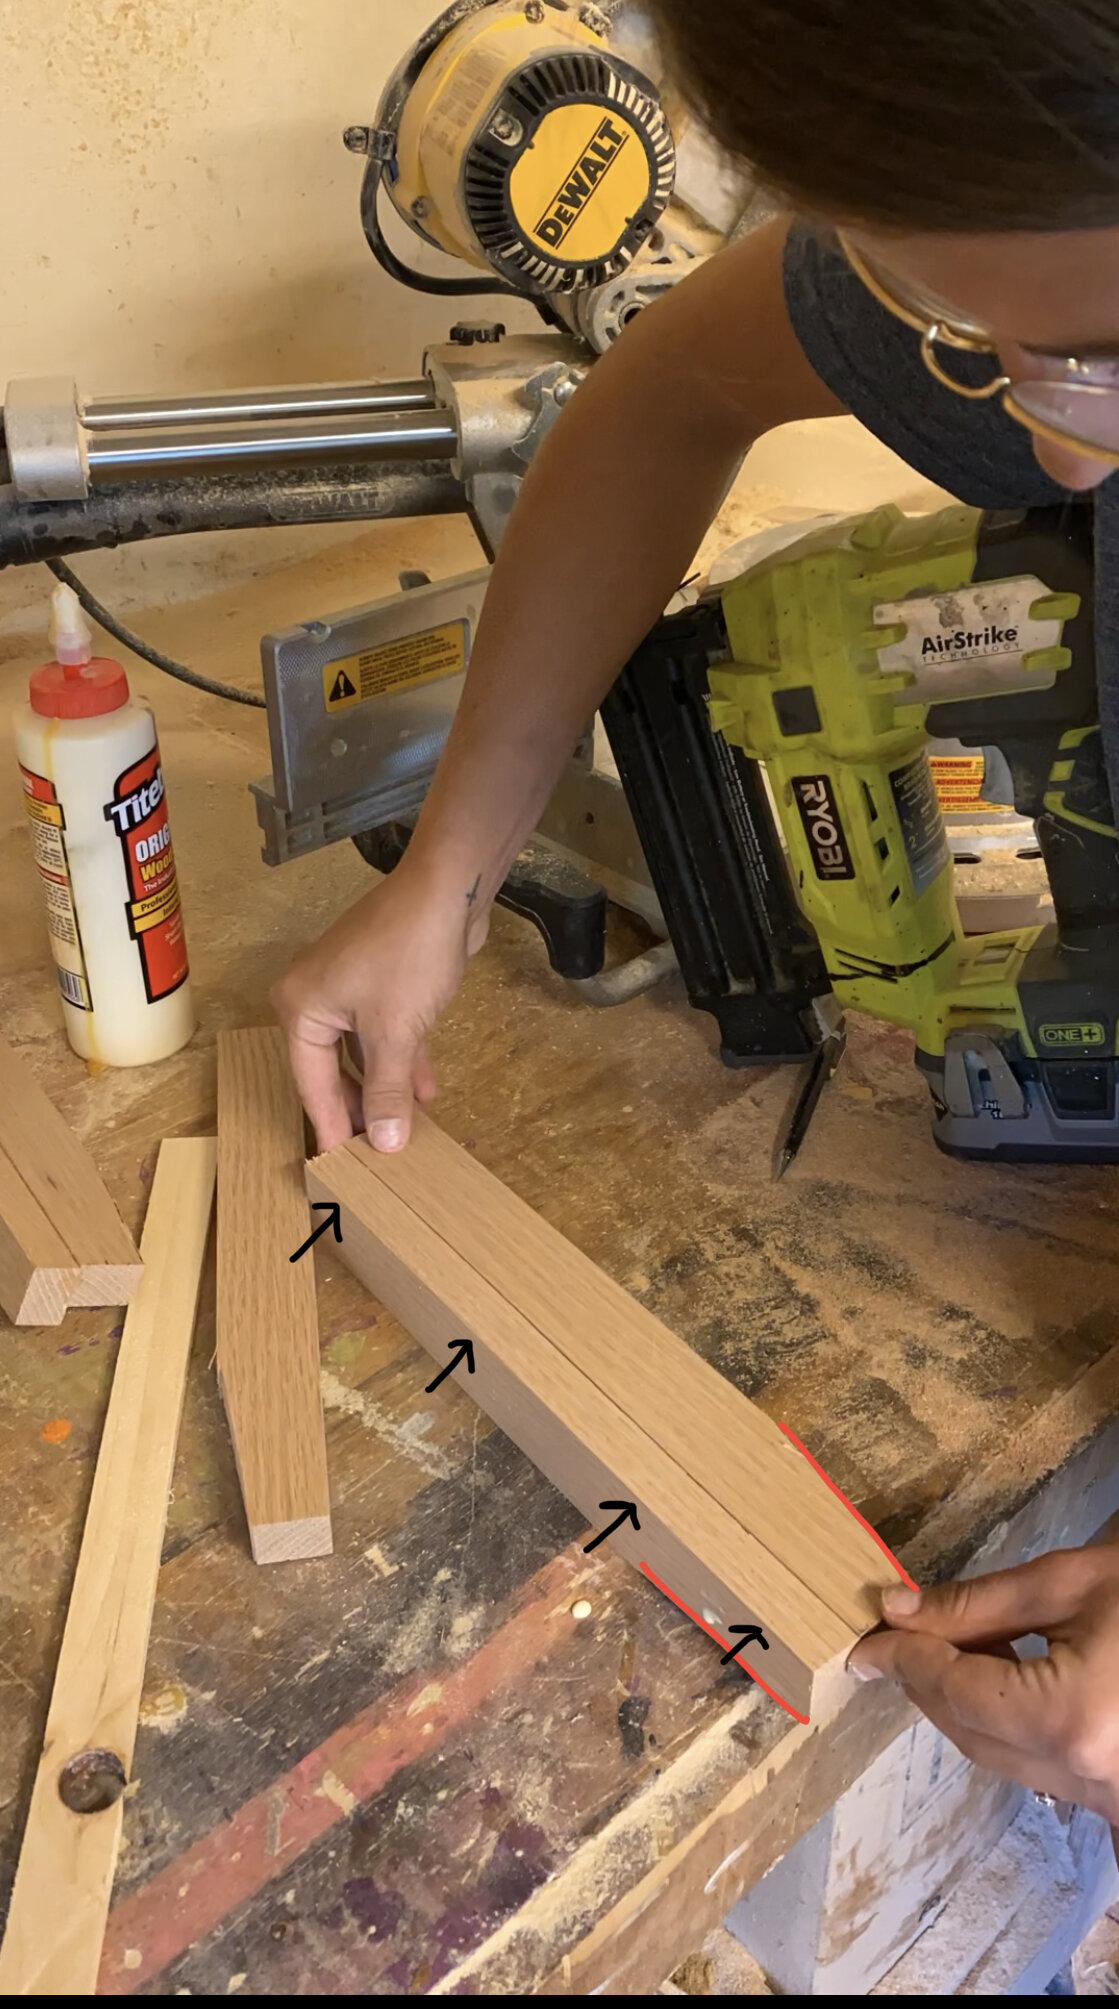
Once all 8 boards are cut how you want them, it is time to attach them and make 4 legs. I used a bead of wood glue and my 18G Brad Nailer to attach them together.
If you have angles on your legs, pay attention to where you’re placing them. And keep in mind how the set up will look at the end because there is a wide side and a narrow side. (See photos below.)
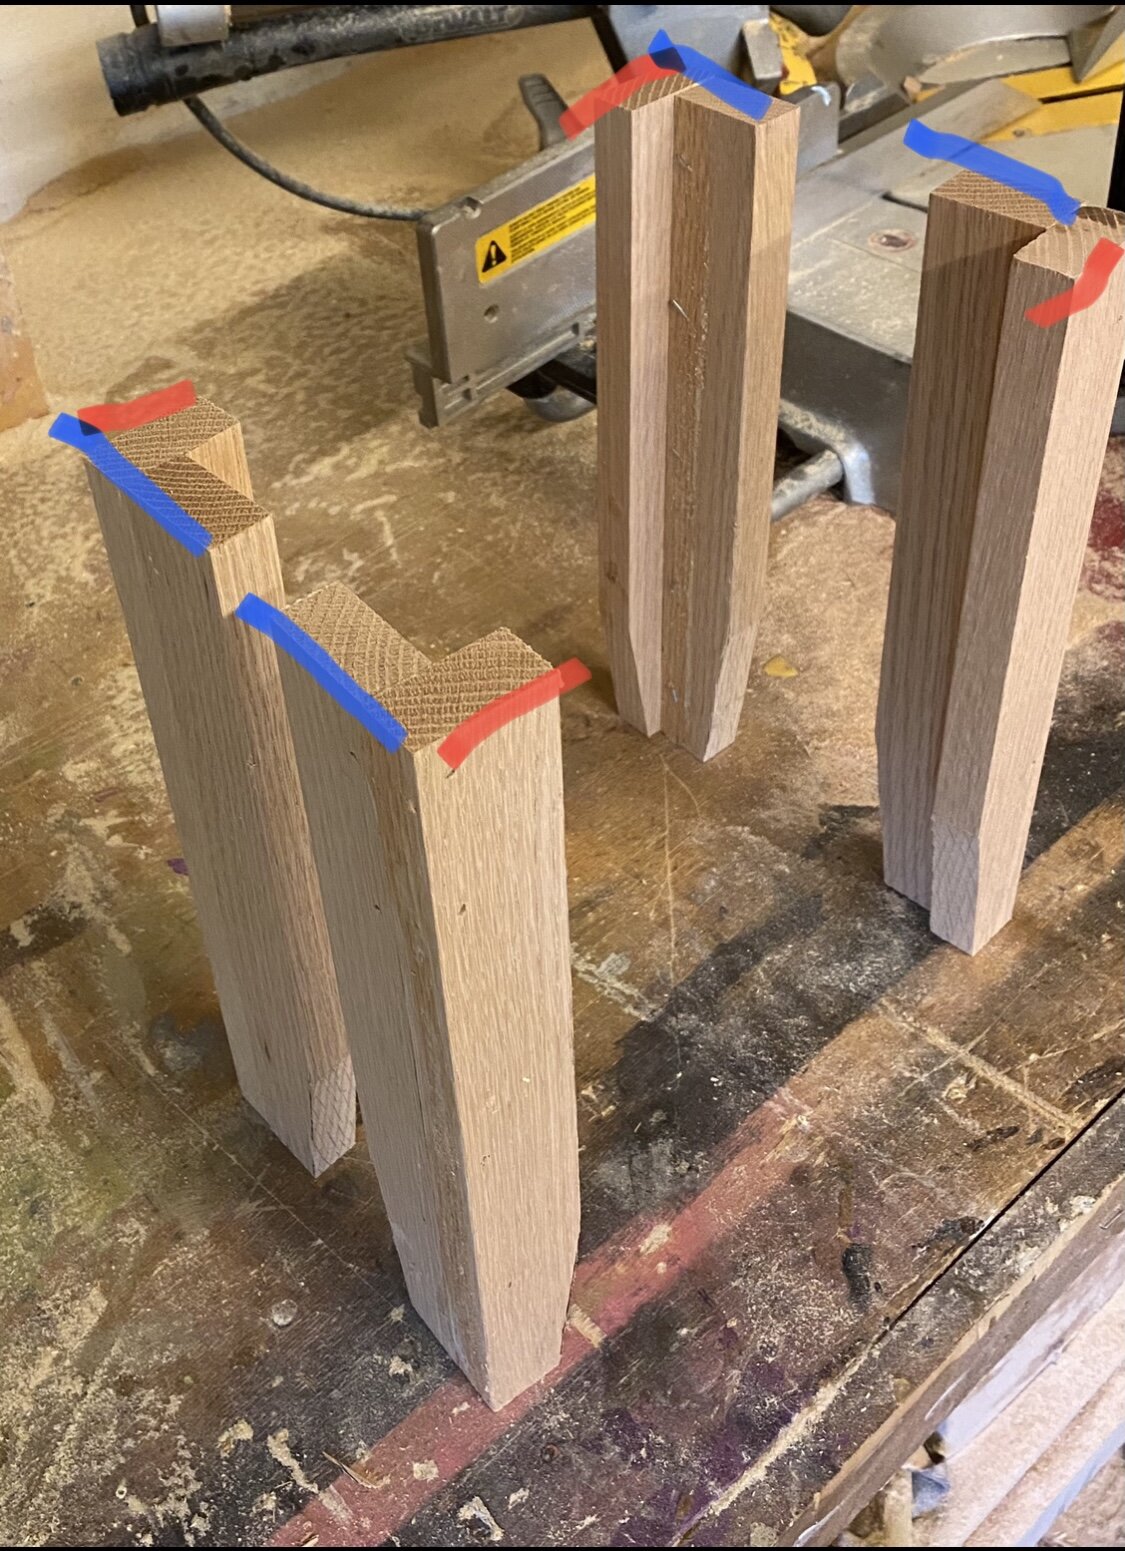
I chose to have the narrow/shorter sides (Red) be for my foot board and headboard and the blue, my running boards.
If you follow my measurements make sure yours are set up this way as well. If they are not, you’re going to want to adjust your measurements accordingly!

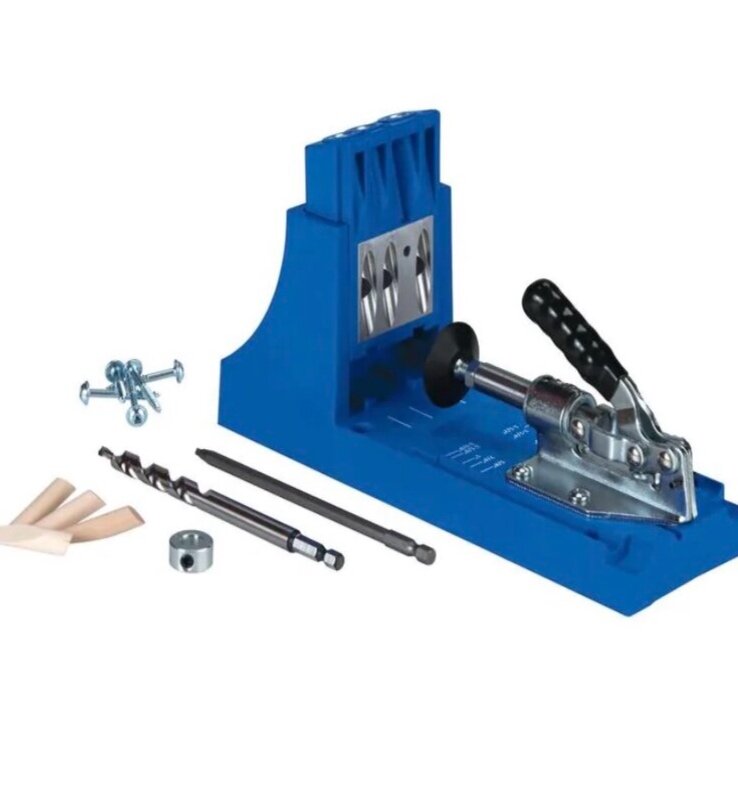
Now that your legs are ready. It’s time to make your frame. You’re going to take your 2 – 75” boards and your 2 – 80” boards and put pocket holes on each end. I use my keg jig for this (setting the choke at 3/4 on both the driver and the jig because the boards are 3/4” thick)
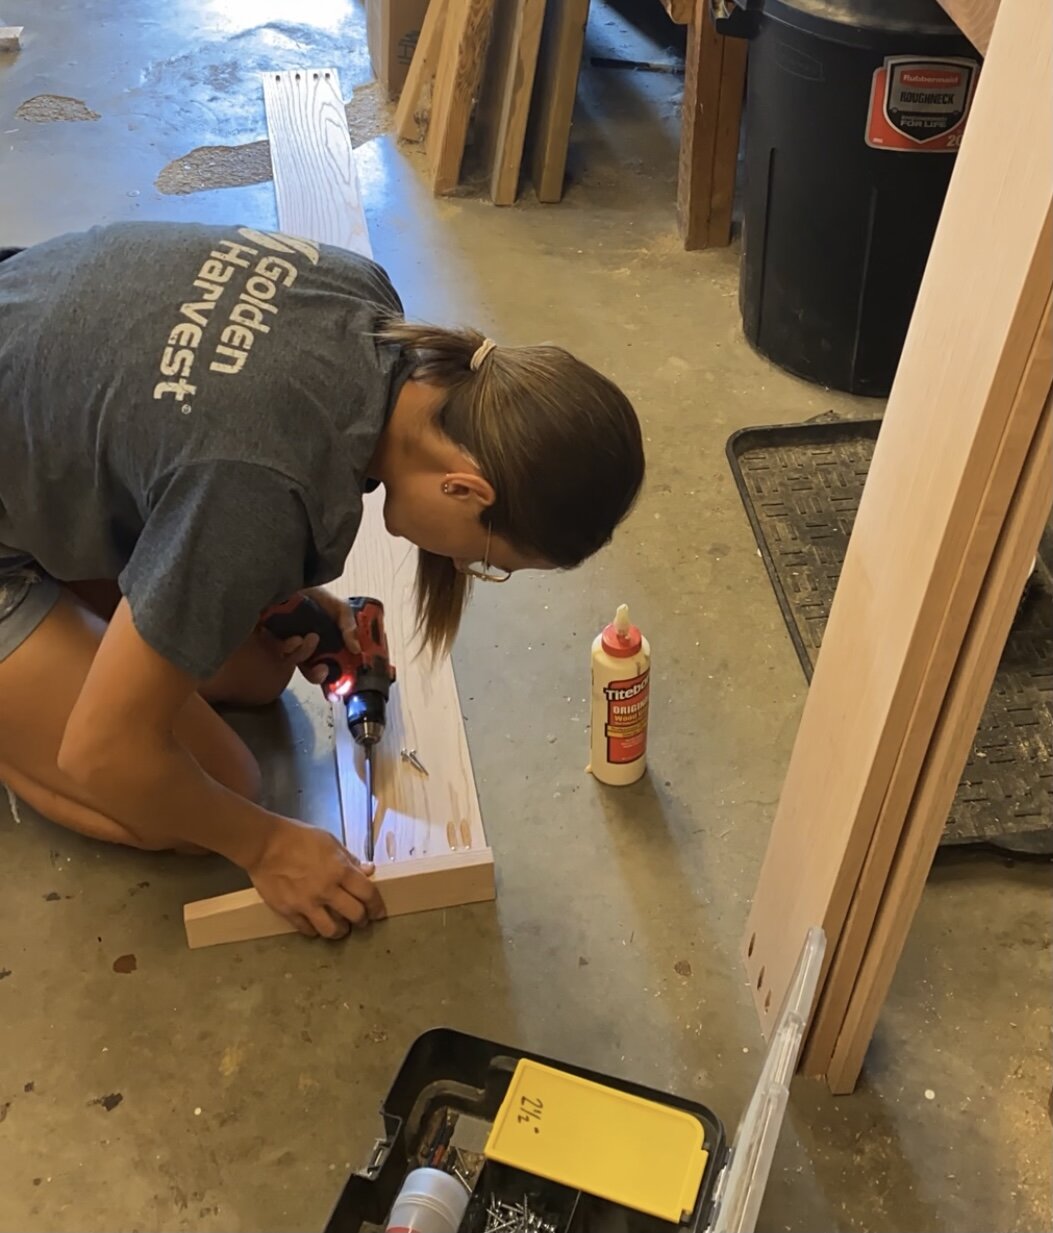
Next up, take your 2 – 75” boards and attach them to the “red” end of your legs (The narrow/short side) using 1 1/4” Kreg jig screws. Repeat with both boards and all 4 legs. This is going to create your headboard and footboard.
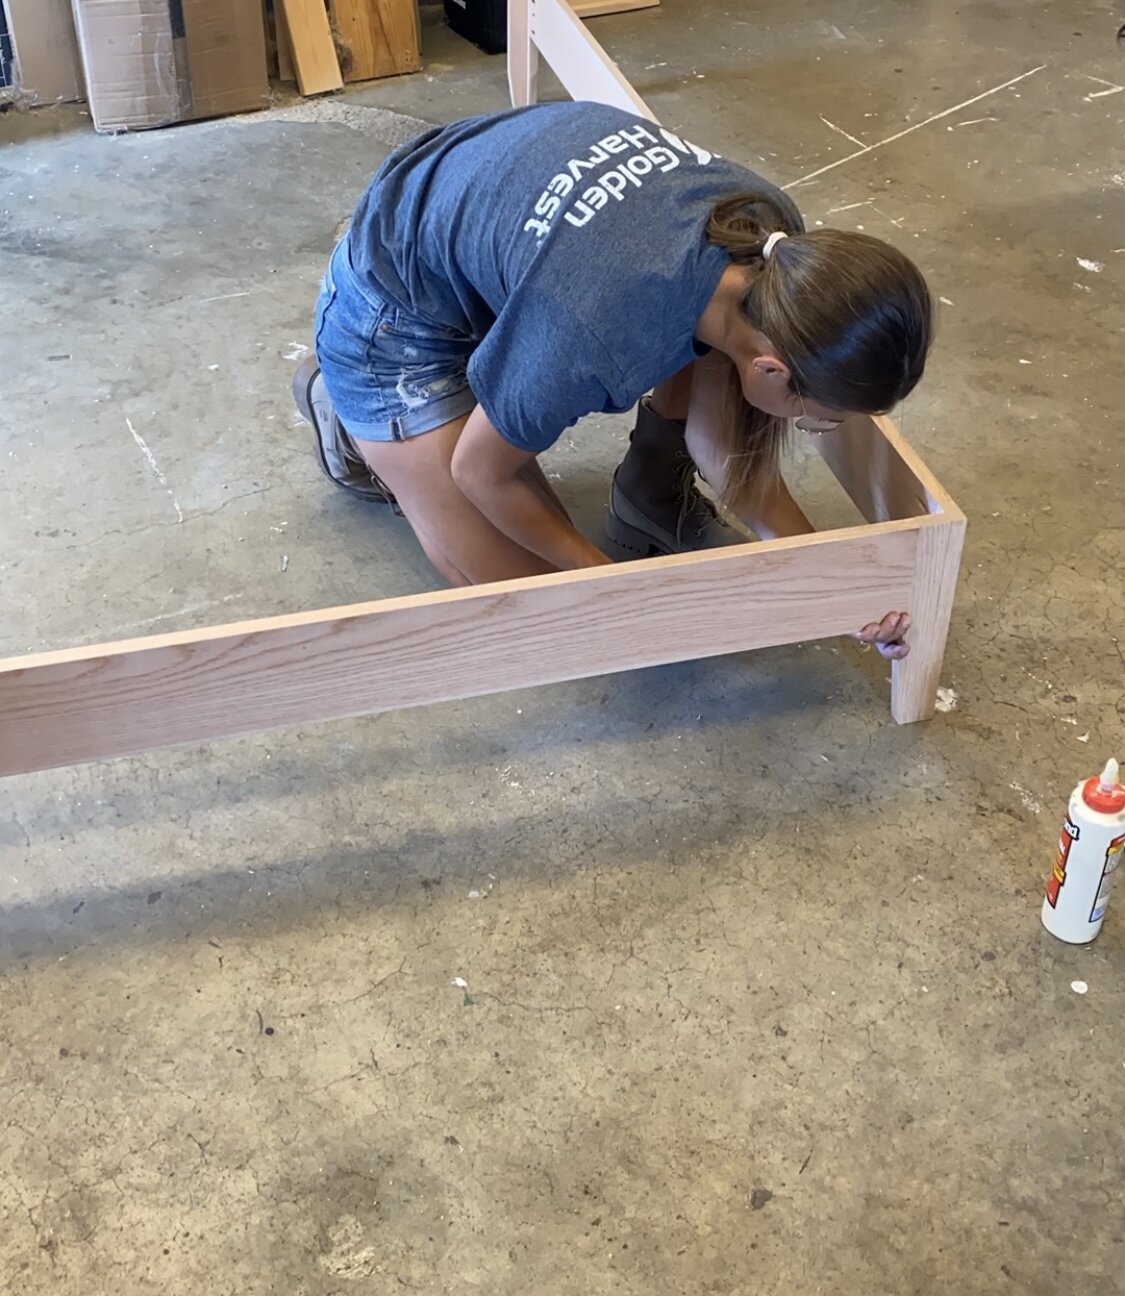
Do the same with your 2 – 80” boards (attaching them to the “Blue/long” side of your legs. This will create the side running boards of your bed) That’s it! You now have the base of your bed completely assembled!
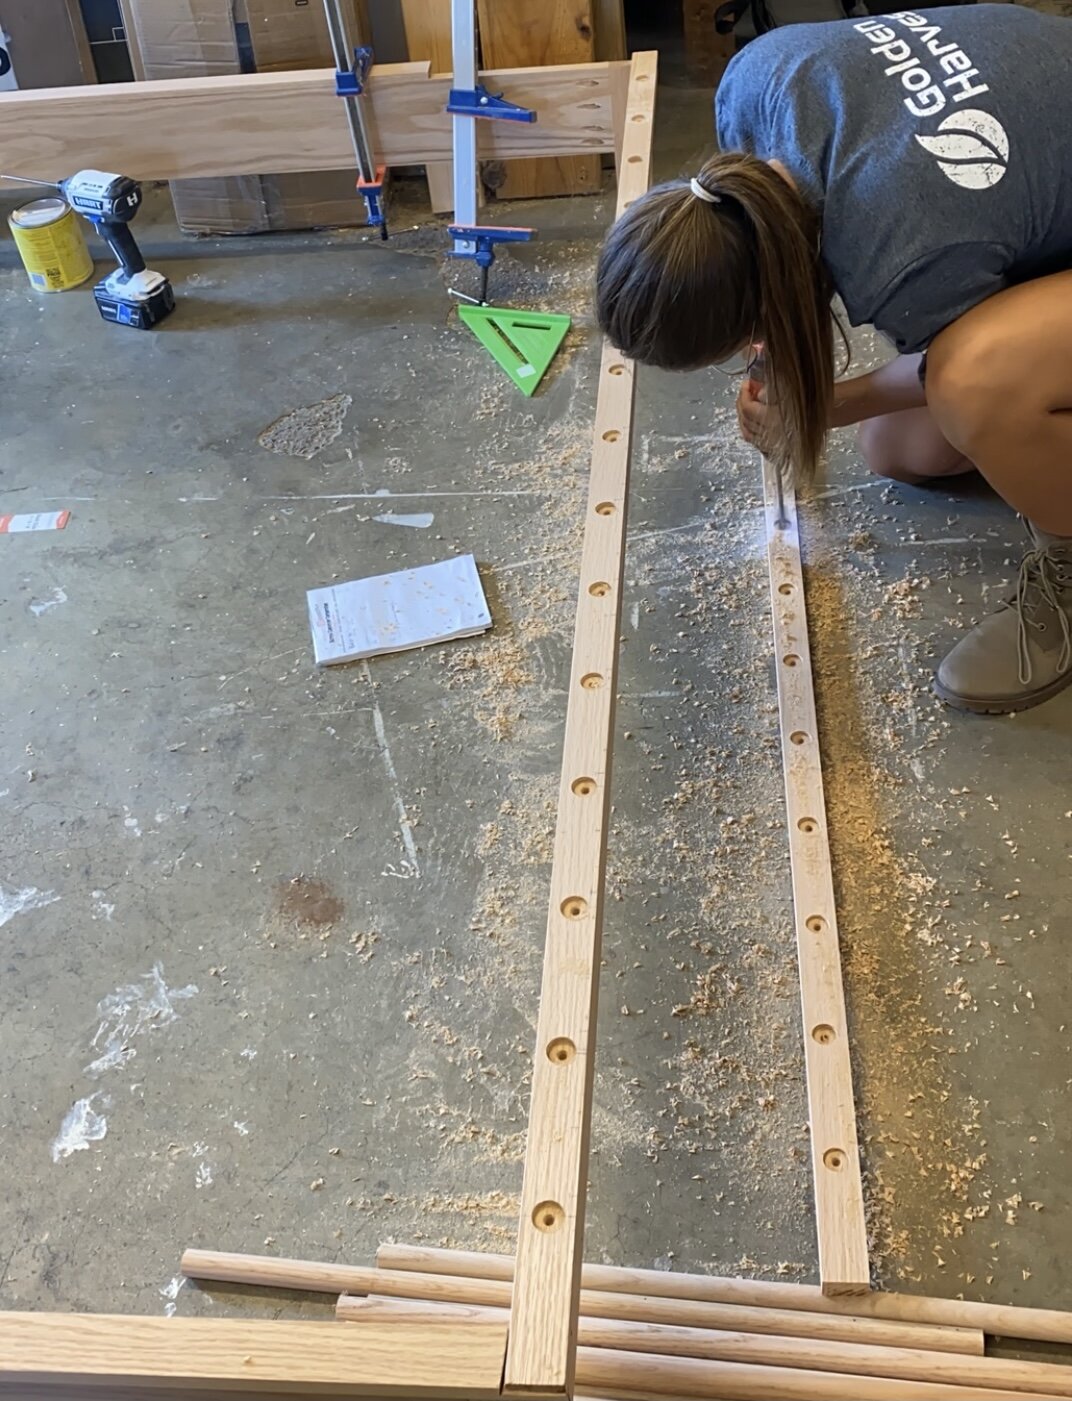
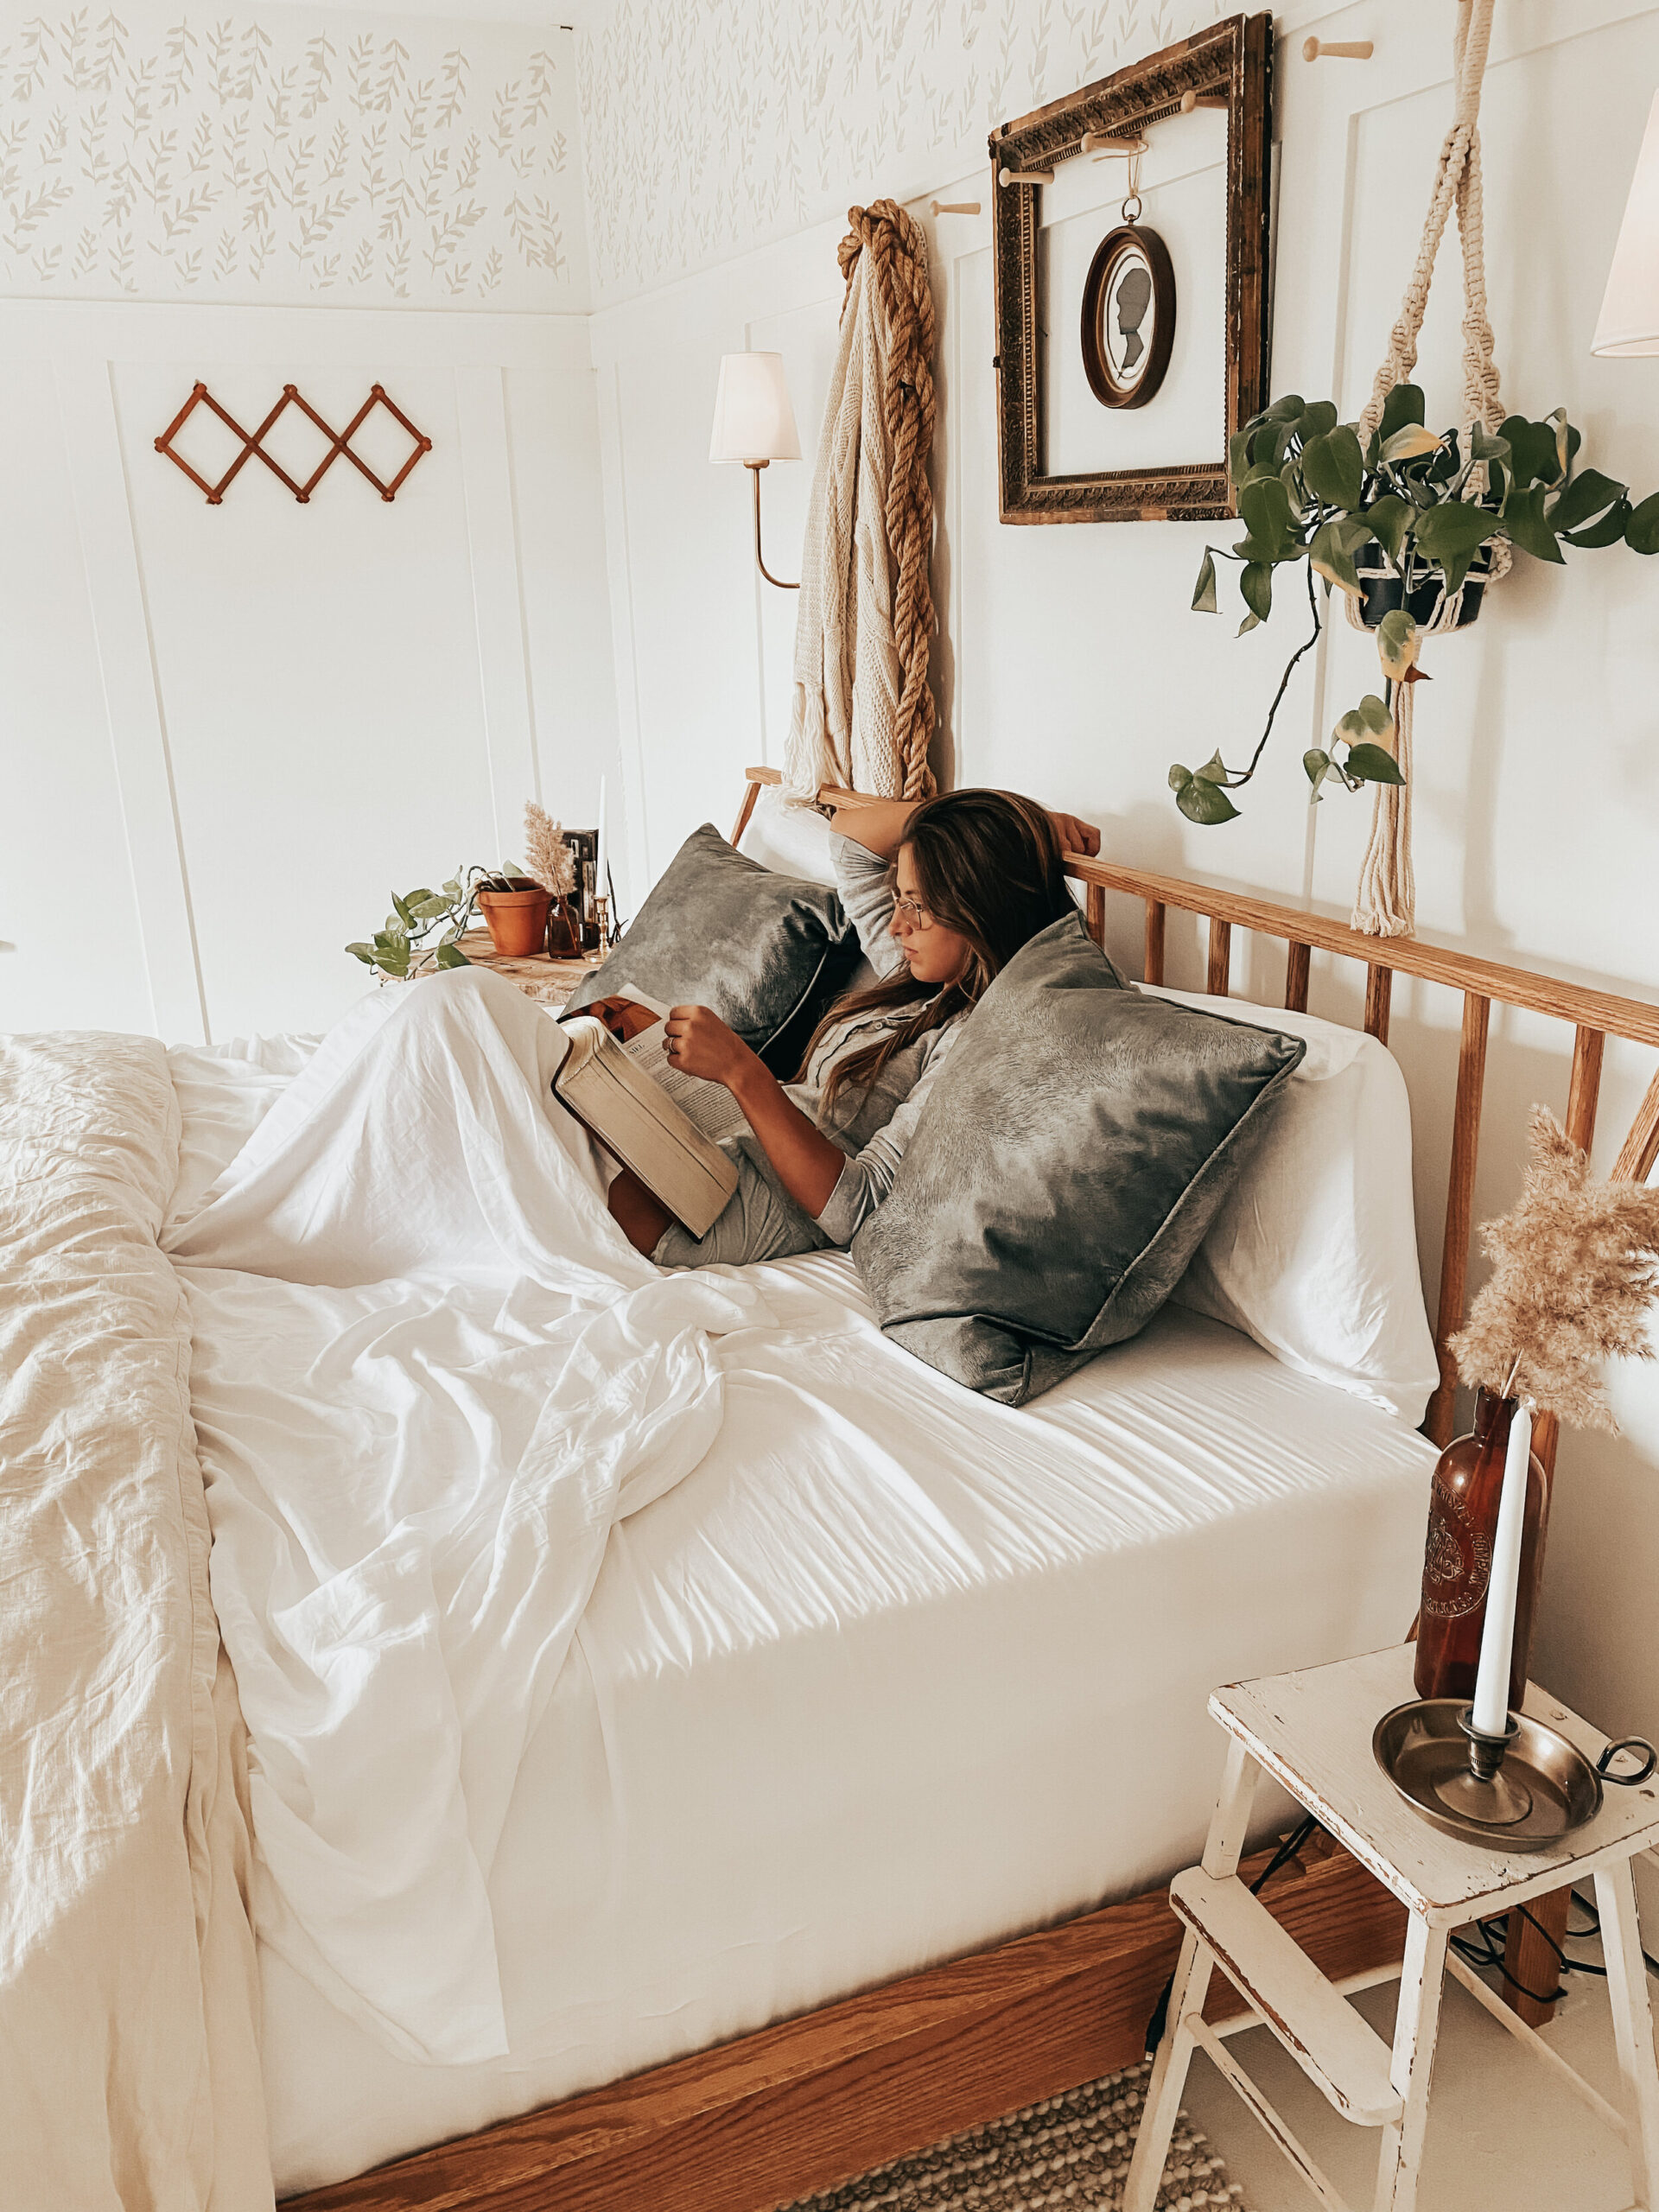
Time to move onto the headboard. Grab your 2 – 1x2s cut at 79 1/2” and you’re going to equally space them out. This is a little tricky and may take a few tries, so use a pencil with a good eraser. I ended up spacing the dowels 5” apart, keeping room on each end for the angled support runner. (I’ll explain that down further in this post). Once you’re happy with the spacing, grab a 7/8 (Maybe even a 1”) spade drill bit and create holes for your dowels to sit in. Do this to the top and bottom 1×2 boards.

Add wood glue in each hole and line your dowels up. This was the trickiest part of the build, in my opinion, because the dowels just don’t like to listen. My biggest piece of advice, take your time and USE CLAMPS. You’re going to need to do a lot of clamping and unclamping during this step. Try not to get frustrated and just trust the process. You will eventually get them all lined up. Once you do, let the glue dry for awhile and before taking the clamps off, predrill some holes (predicting is important here bc you don’t want to split the wood) and run some screws in through the board into the dowel (top and bottom). This will make it sturdier in the long run.
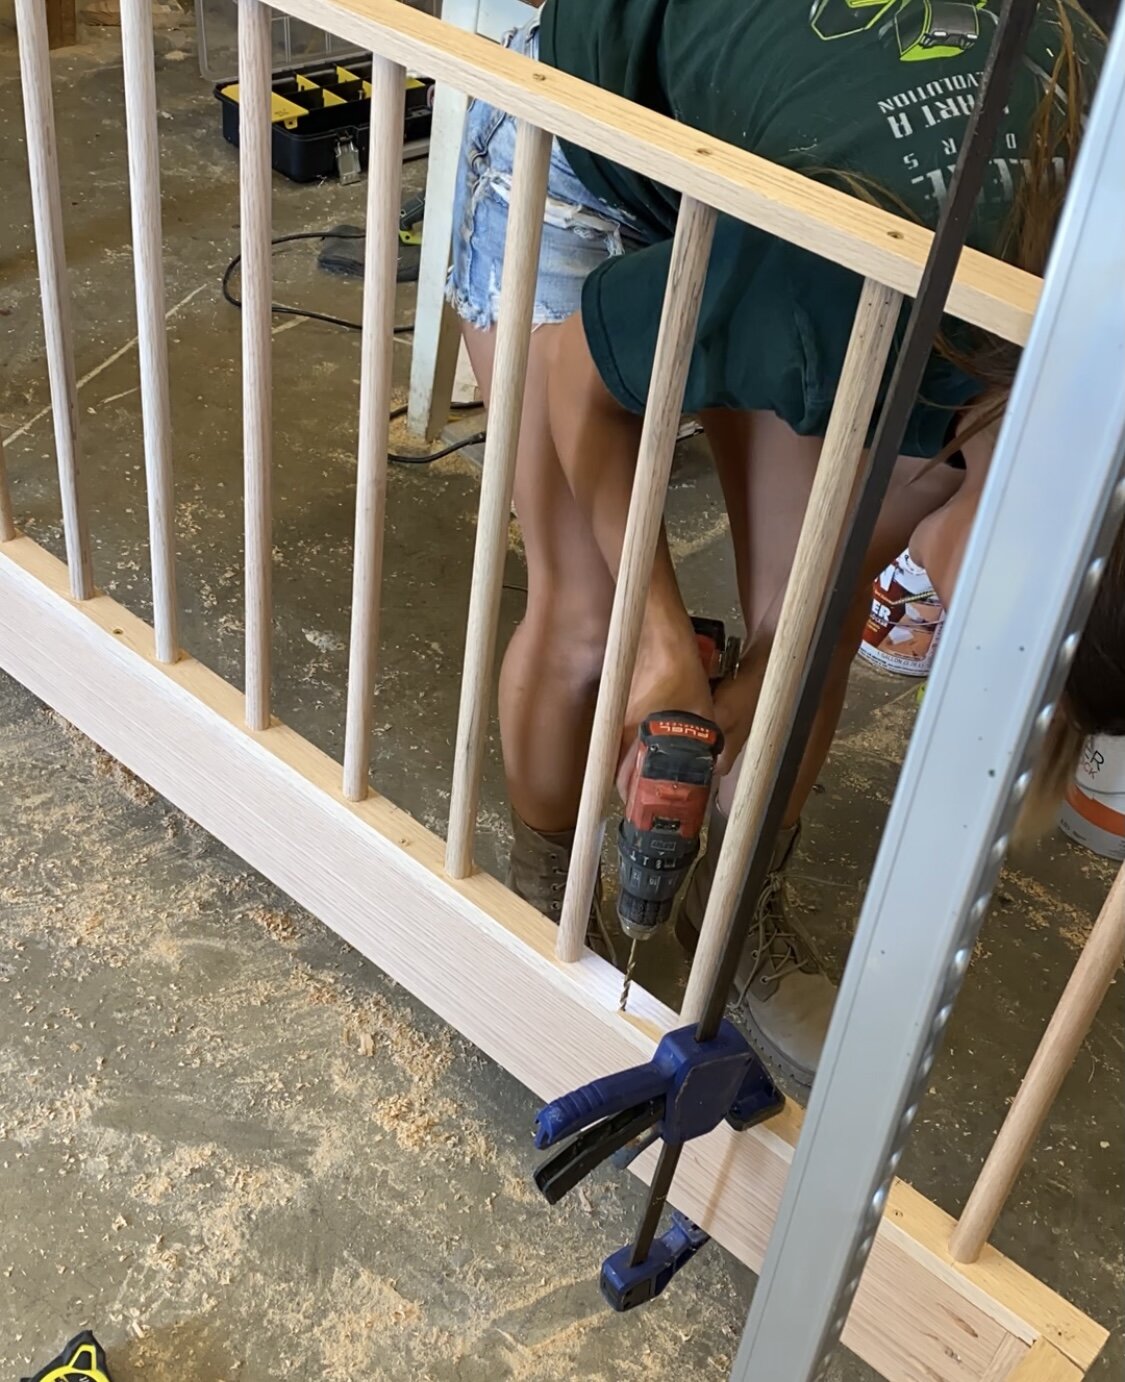
When the dowels are good and dry and reinforced with screws you can attach it to the bed frame (On the 75” board side). I ran a bead of wood glue down the length of the board (and a little on the top of the leg) and then clamped the headboard down. Then predrilling (Again, super important so nothing splits) and adding screws to secure it.
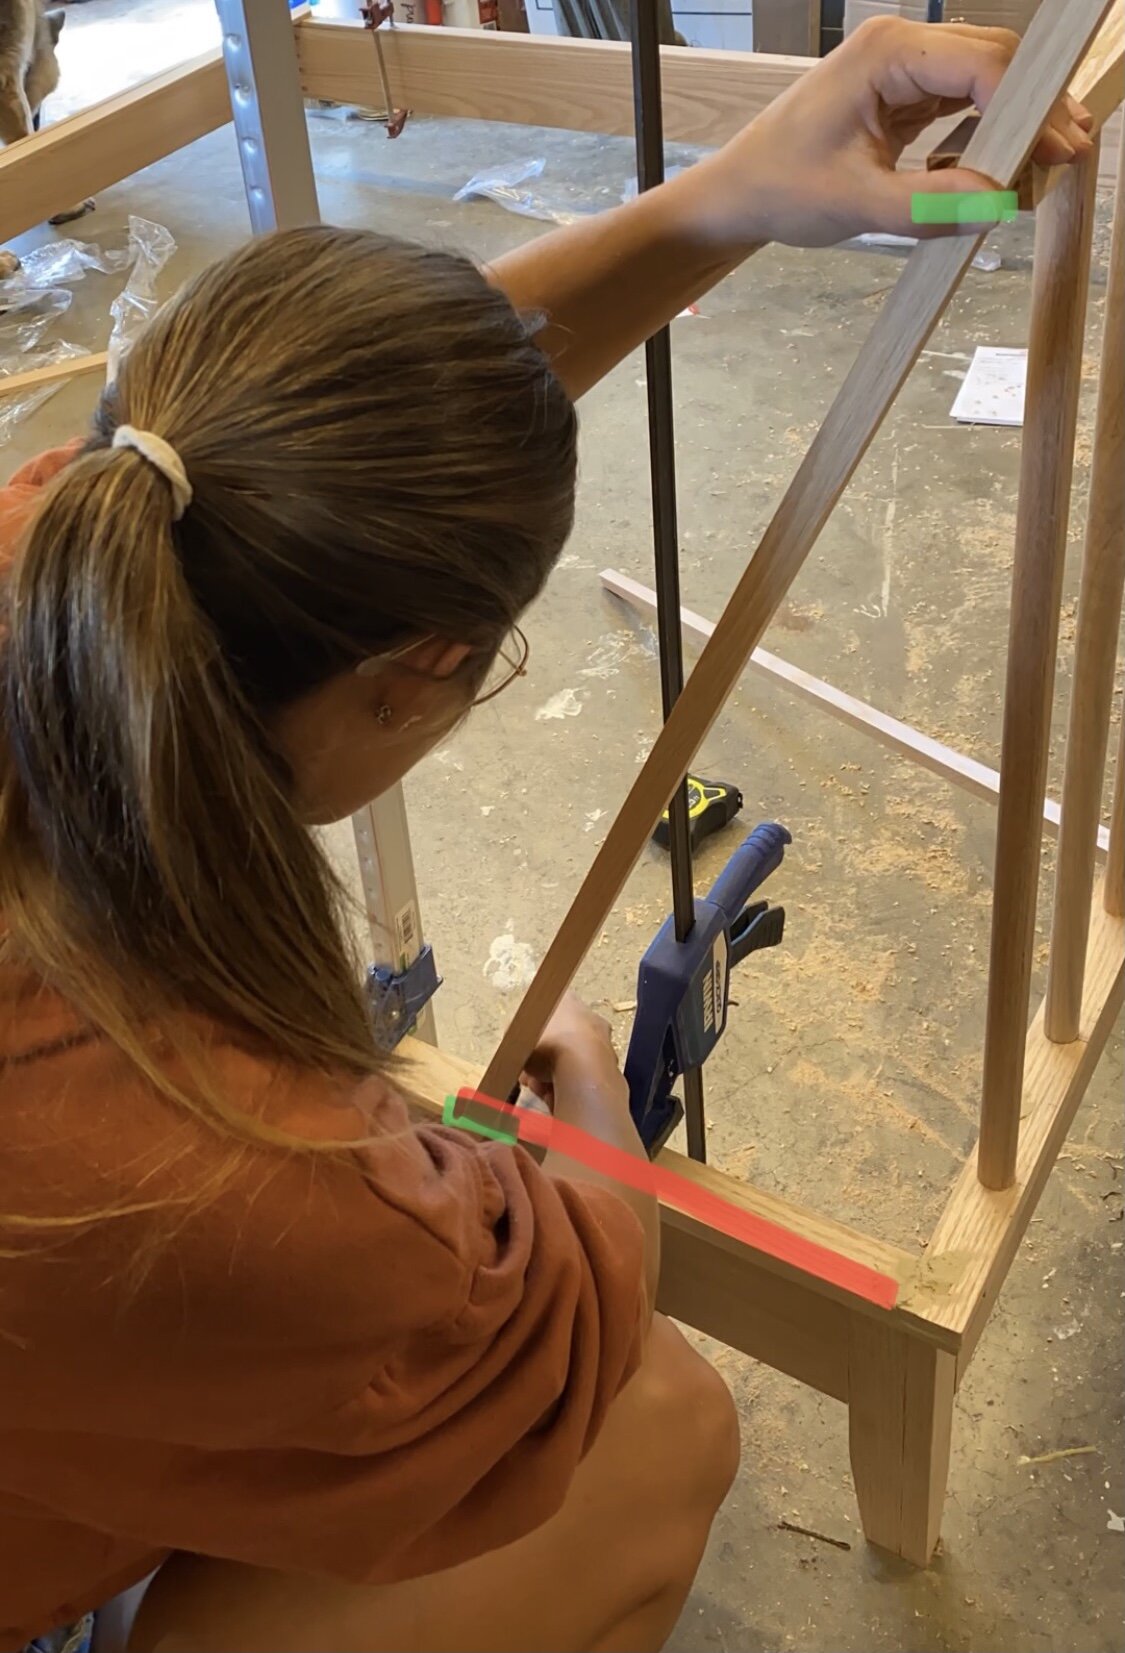
Grab those 2 – 1×2 cut @ 12.5” (for the headboard support bracket. highlighted in red) and clamp them down. Do not glue or nail these or you won’t be able to take your bed apart and move it to your bedroom. Now take the 1×2 that you ripped in half (making it a 1 x 3/4” (should be a square. Actual measurements should be 3/4” x 3/4’‘). To find the correct angles here, hold it up and mark where the green highlight is. After you cut the angles, you can attach them now using wood glue and a brad nailer, or set them to the side and wait to attach them once everything is in your room for final assembly. (just don’t forget to stain/paint them)
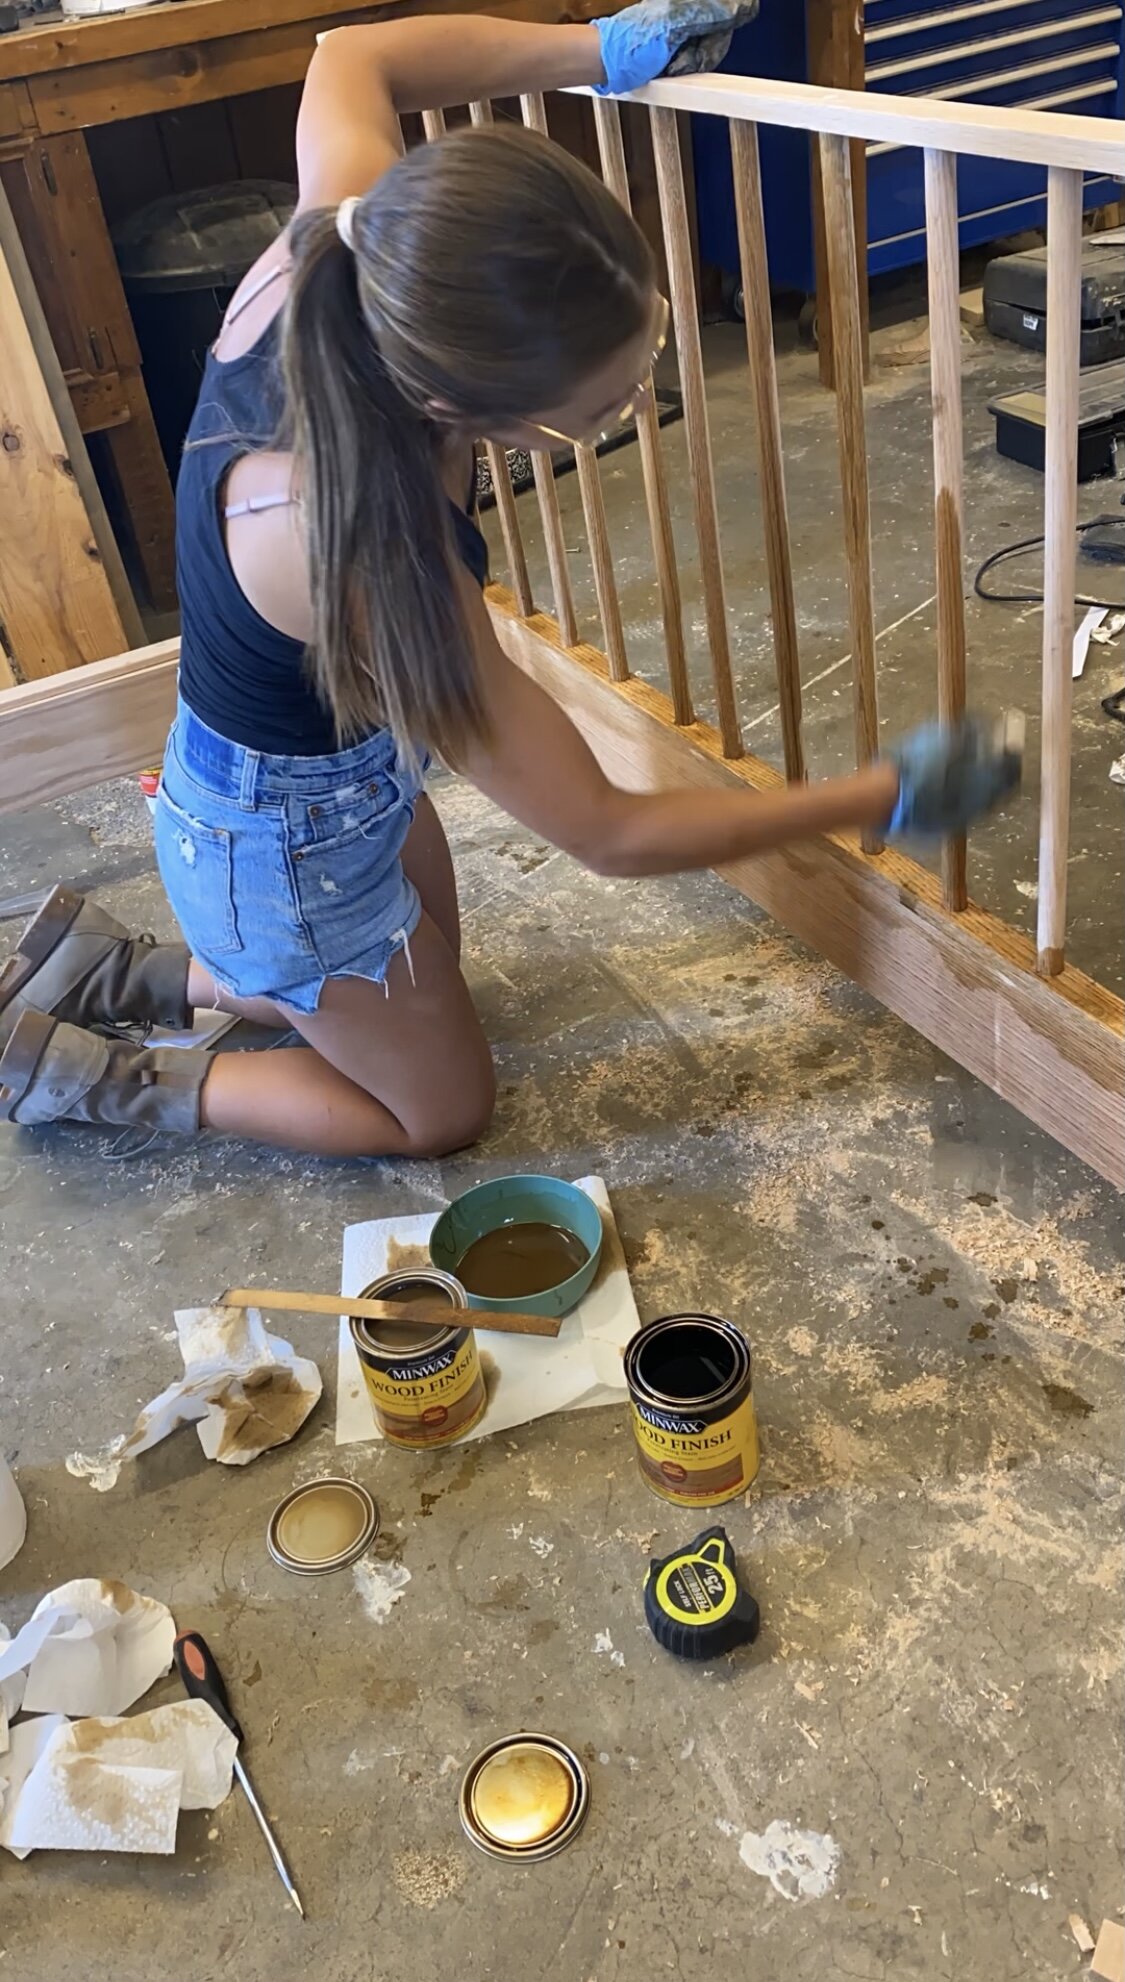
Before you stain, make sure you sand down any glue runs (else those spots won’t take the stain). I chose to make a custom stain color by mixing Minwax “Fruitwood” and “Puritan Pine” in a 50/50 ratio. Make sure everything is stained, even the pieces you haven’t yet assembled. Such as, your 1x2s that are cut on angles and your headboard supports. (no need to stain the 1×3 furring strips, the running side support, or the 4x4s, those will all be hidden under your mattress)
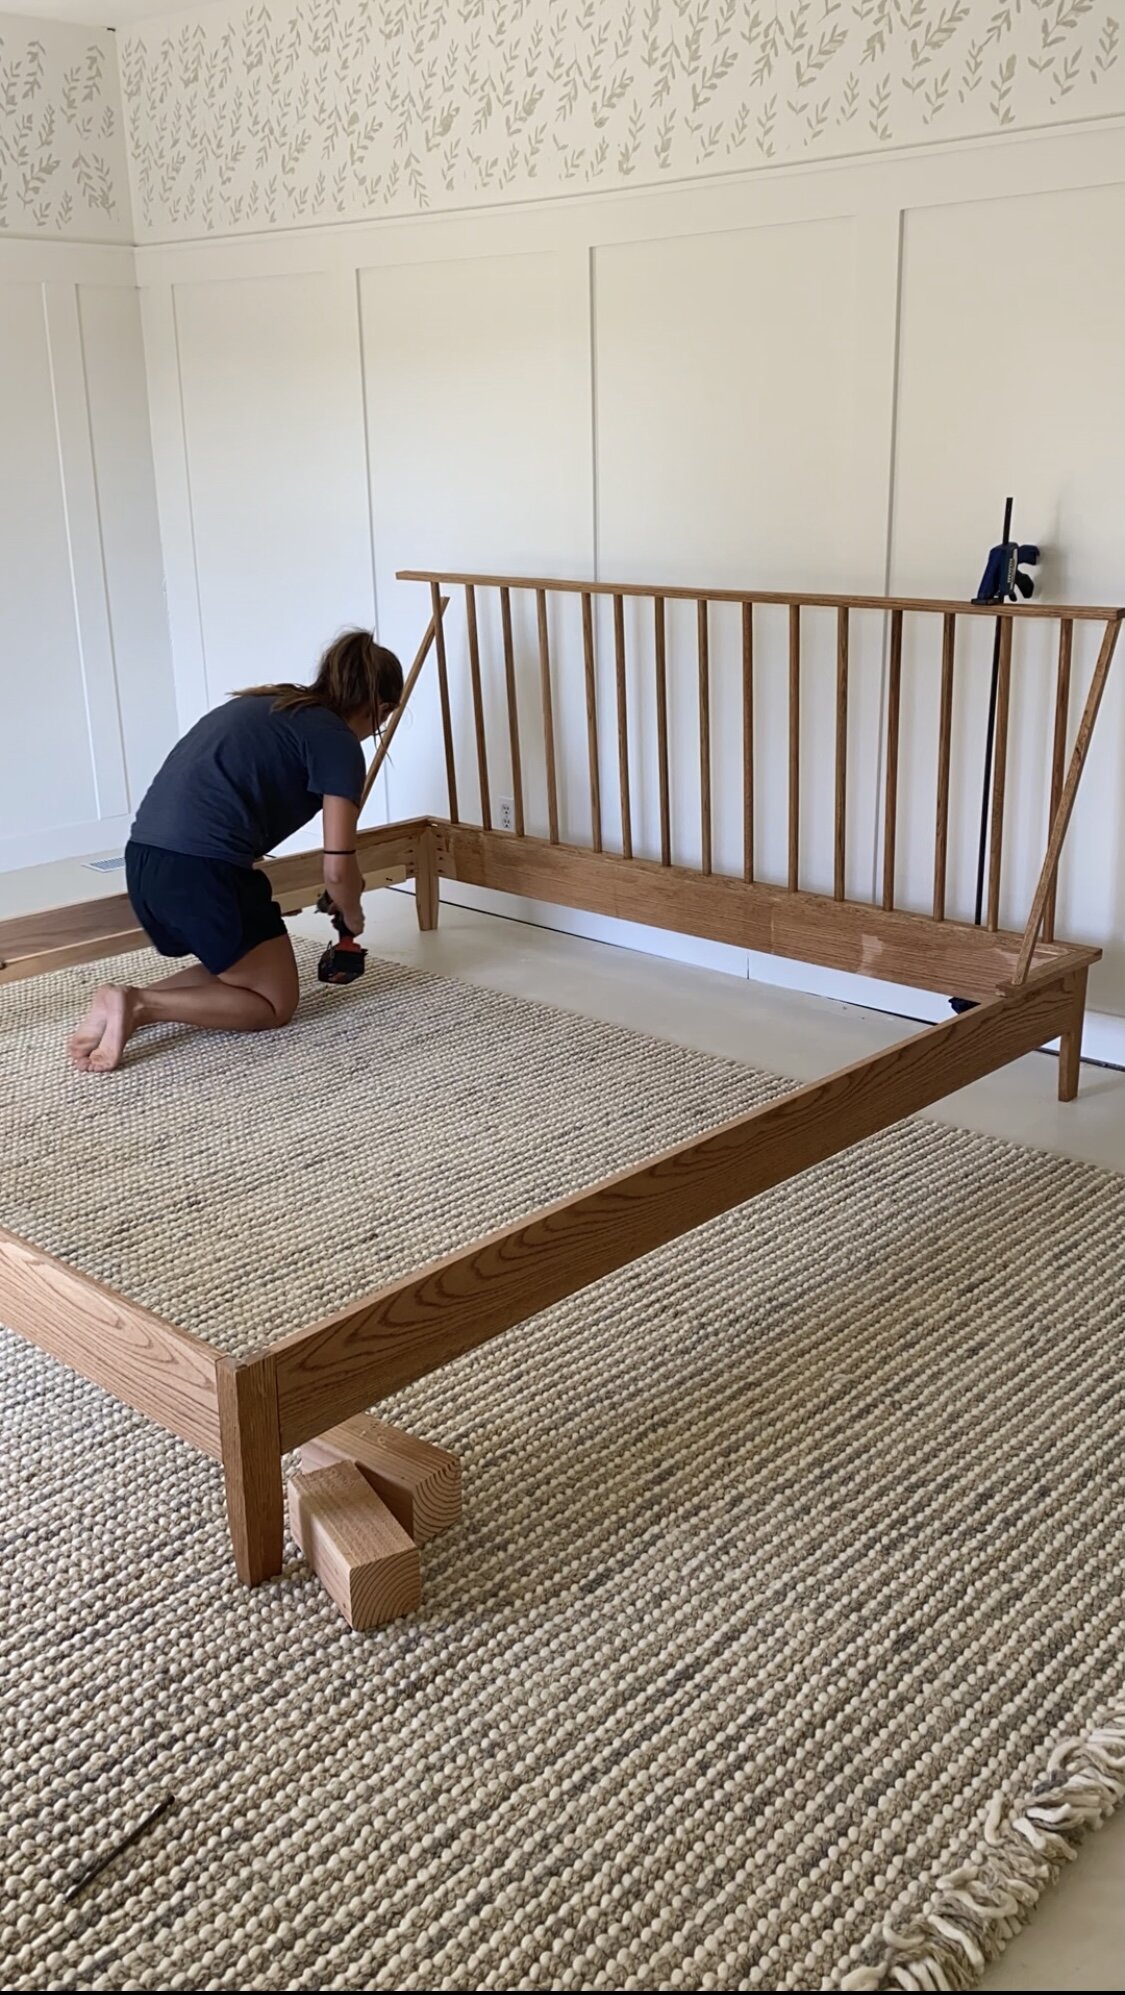
Once the stain has dried for a day or so (it no longer smells). Take your bed apart. The best way to do this is, taking your pocket hole screws out from where the side running boards attach to the legs. You should be left with your legs still attached to the headboard and footboard and you have two “empty” 80” boards. Bring them to their final desination (aka your bedroom) and reattach. Once everything is reattached, you can add your 1×2 @80” side supports (like in this photo). I predrilled and attached with screws every 12” or so. This side support is what is going to hold your furring strips and act as a box spring mattress.

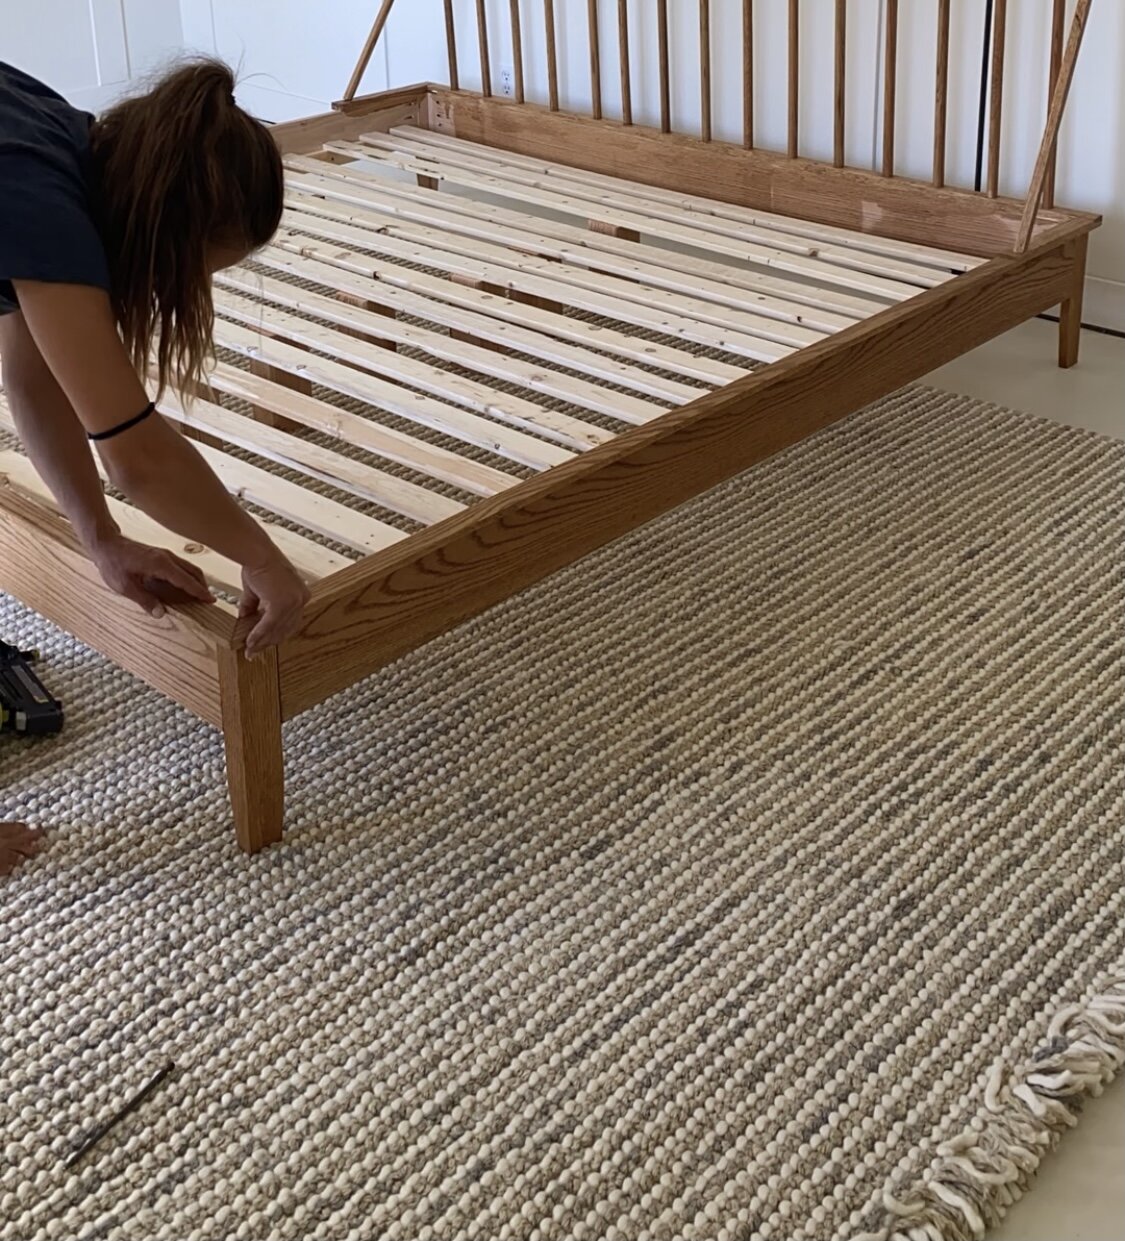
Lay your furring strips out, and add a 4×4 post every so often. This will help support the middle of the bed, and take some weight off the side supports. I attached the 4x4s with a couple screws, and then attached the furring strips into the side supports with a brad nailer.
At this point, you can attach everything else that hasn’t already been assembled. Here I am attaching those 1×2 trim pieces (cut on 45*) for a nice clean look. Im attaching them with my 18G Brad Nailer. This is also the time to attach those side support brackets and 3/4” x 3/4” support bars. You’re ready to move your mattress in!! Please let me know if you have any questions on anything, that’s what I’m here for! And don’t forget, if you give this a go, tag me on IG or TikTok @TimberNTwine!


Comments